Warning
The product is in closed beta and not open to the public.
Using VisionByte Version Control in Unreal Engine
This guide is intended for team members using Unreal Engine 5 and the VisionByte Source Control plugin. It covers the workflow from preparing a repository, creating a workspace, and connecting the editor to updating, locking, committing, viewing history, reverting, and shelving changes.
VisionByte uses a repository file + local workspace model. A repository is typically a .vbyte file, while a workspace is a directory containing Unreal project files. Unlike Perforce, files in a VisionByte workspace are generally always writable. However, Unreal binary assets such as .uasset and .umap cannot be merged easily. Teams are therefore advised to check out assets before editing them, using locks to prevent multiple people from modifying the same asset simultaneously.
1. Prerequisites
Before you begin, make sure that:
The VisionByte Source Control plugin matching your project’s Unreal Engine version is installed.
Team members use compatible versions of the VisionByte client.
If the plugin has not been installed, download the plugin archive compatible with your Unreal Engine version from the VisionByte official website. Close Unreal Editor, extract the archive, and copy the VisionByteSourceControl folder into the project’s Plugins directory:
ProjectDirectory/
└── Plugins/
    └── VisionByteSourceControl/
        └── VisionByteSourceControl.uplugin
Reopen the project, enable VisionByte Source Control under Edit > Plugins, and restart the editor when prompted.
2. Create or Obtain a VisionByte Workspace
2.1 Join an Existing Team Project
For an existing project, it is recommended to clone the repository and create a workspace using VisionByte Desktop or the command line before opening the .uproject file in Unreal Editor. The following example uses VisionByte Desktop.
On the New page in VisionByte Desktop, click Clone:
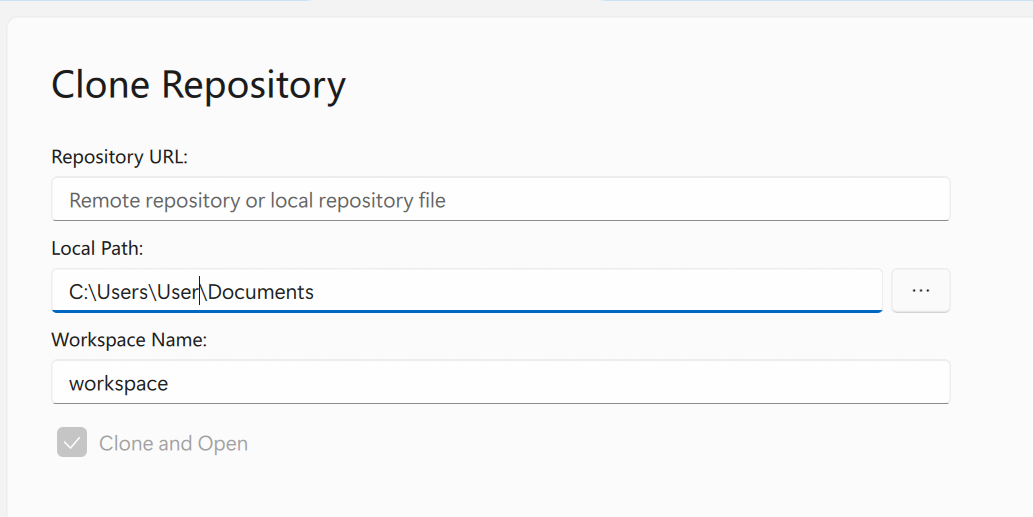
Enter the repository URL and workspace location, then click Clone and wait for the operation to finish.
After cloning, the project’s .uproject file should be located in the workspace directory or one of its subdirectories.
2.2 Initialize a New Project in the Editor
If the current project is not yet managed by VisionByte:
Open the project and click the Source Control icon in the status bar at the bottom of the editor.
Select VisionByte as the source control provider.
Under Repository File, choose the location and filename for a new
.vbyterepository file. Do not select or overwrite an existing repository file.Confirm the read-only Workspace path. The workspace is fixed to the root directory of the current Unreal project.
Enter Project Name, Project Description, and User Name.
Click Initialize project with VisionByte.
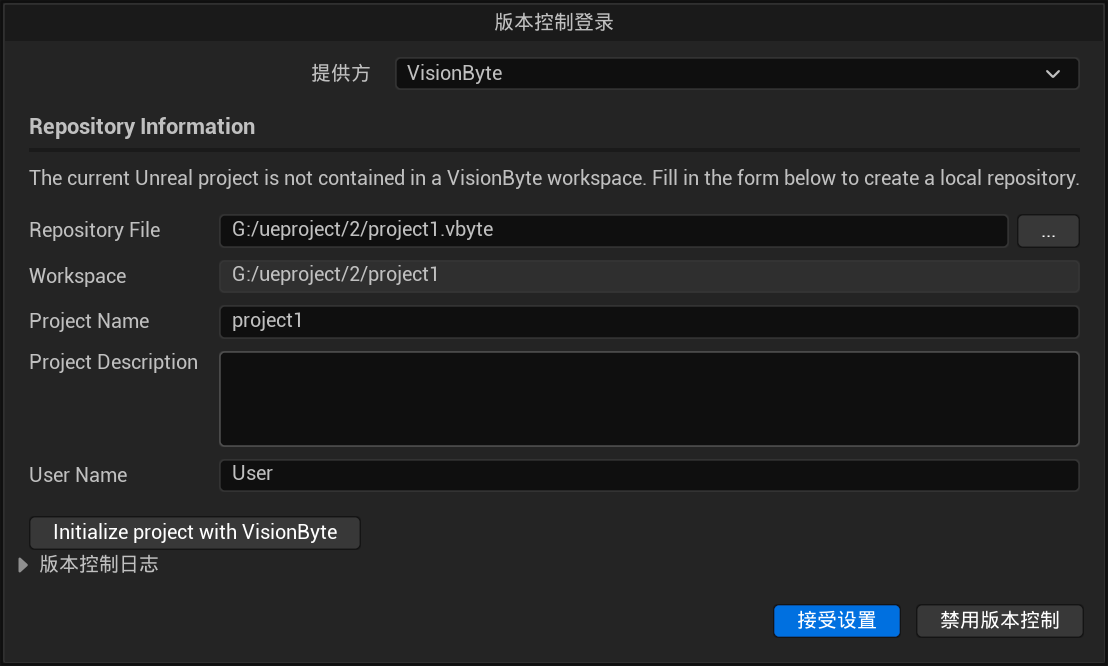
The plugin creates a .vbyte repository file at the selected location. If the project name is blank, the filename defaults to Project.vbyte. It then connects the selected workspace to that repository.
If VisionByte generates an initial administrator password, it is displayed only once in the success message. Make sure to save it securely.
Initialization creates only the repository and workspace. To import the project for the first time, you must still mark the project files for addition and commit them.
To start a server for collaboration on the local network, run the following command:
vb server <Project Name>.vbyte
The administrator credentials are the User Name specified during repository initialization and the randomly generated password shown afterward.
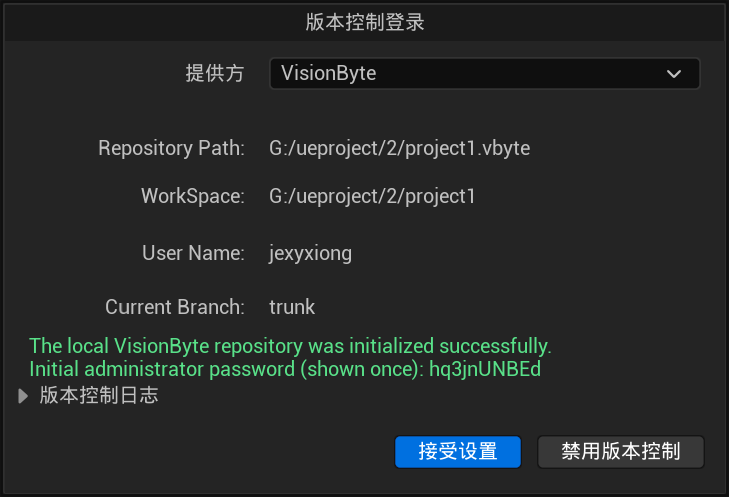
2.3 Import Project Files for the First Time
Files and directories that should generally be version-controlled include:
Config/Content/Plugin source code and resources under
Plugins/that must be shared with the teamSource/(for C++ projects)Build resources under
Build/that must be sharedThe project’s
.uprojectfile
Locally generated content that should generally not be version-controlled includes:
.vs/Binaries/DerivedDataCache/Intermediate/Saved/Local IDE temporary files and user-specific settings
You can configure ignore-glob rules before adding and committing the files for the first time:
In VisionByte Desktop, select the relevant files or directories, right-click, and choose Add to mark them for addition.

To commit the files, click Check In in VisionByte Desktop. Enter a description of the changes, then click Commit to complete the submission.
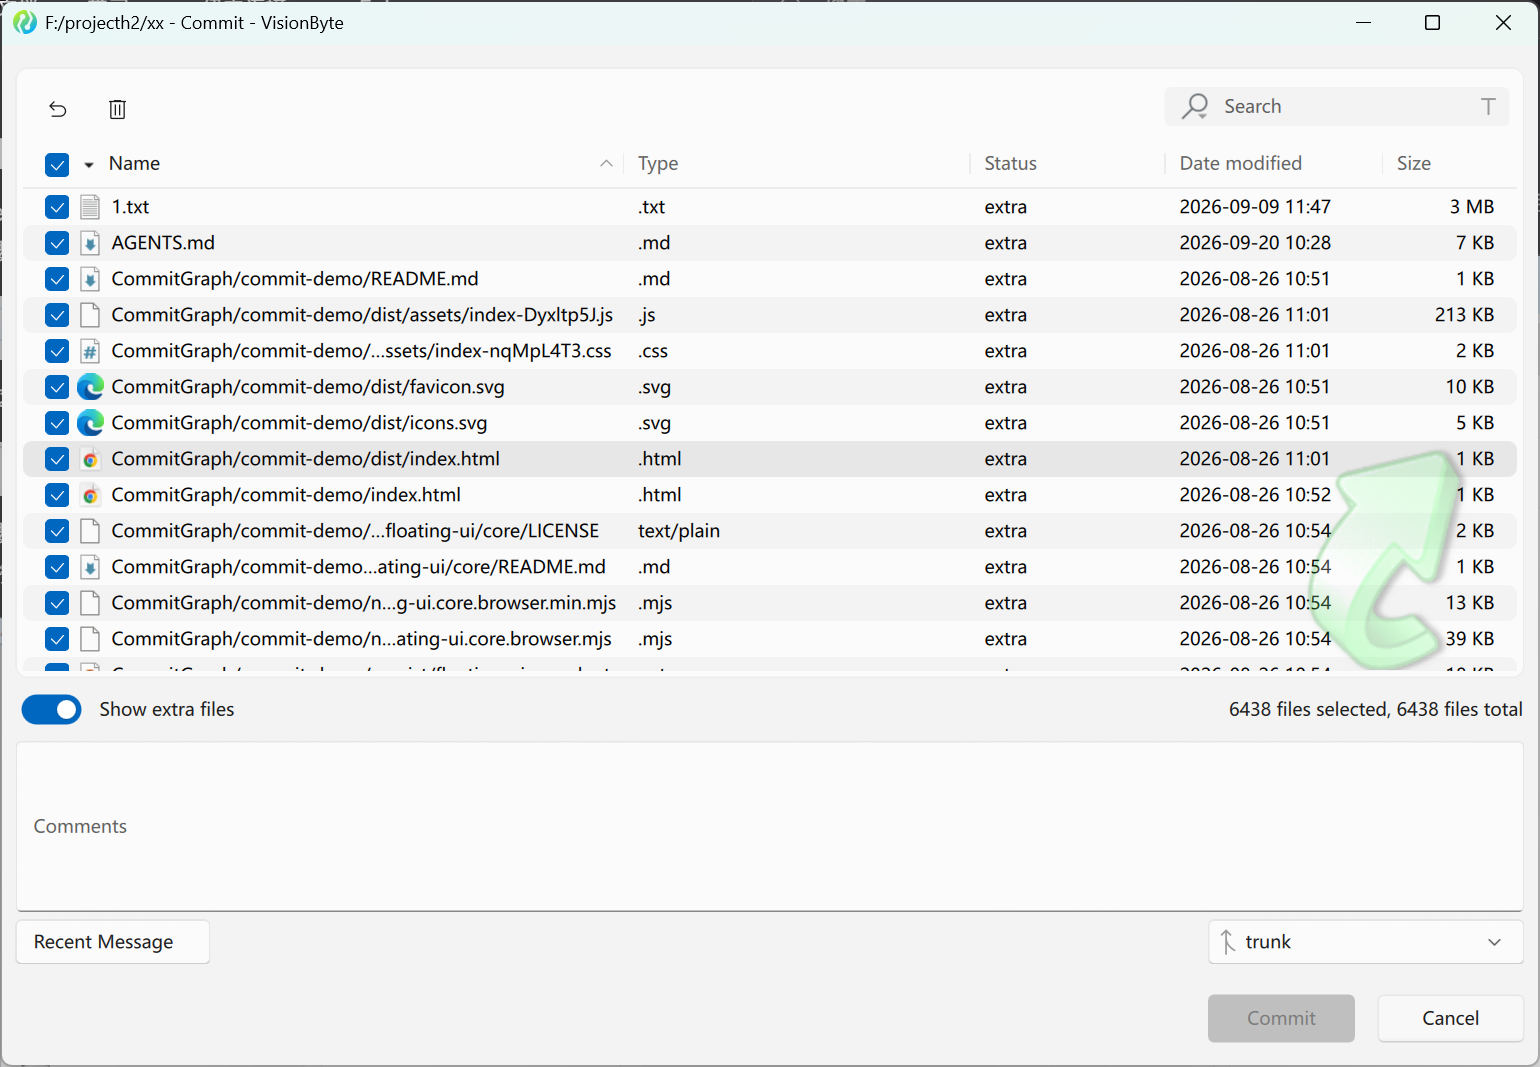
3. Connect VisionByte from Unreal Editor
Confirm that the
.uprojectfile is inside an existing VisionByte workspace.Launch Unreal Editor and click the Source Control icon in the bottom status bar.
Select Change Source Control Settings or the corresponding connection option.
Select VisionByte as the provider.
If the project is located in a valid workspace, the repository information is detected automatically. Verify the details and accept the settings.
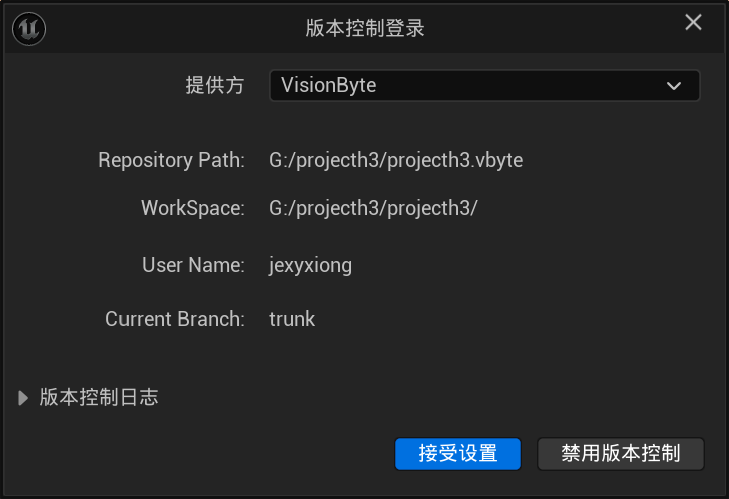
If the interface still asks you to initialize a repository, the current .uproject file is usually outside a valid workspace. Check whether the project is located within the version-controlled workspace.